Let’s make some yarn pumpkins, using balloons!
This heartwarming Yarn Pumpkin Craft that will not only add a touch of seasonal elegance to your space but also serve as a testament to the beauty of handmade decorations. Grab your supplies and join me on this fun journey as we weave, wrap, and craft our way to adorable yarn pumpkins that will easily elevate your fall decor. Get ready to infuse your home with the warmth and charm that only handmade creations can bring. Let’s dive in!
supply list for yarn pumpkins:
- Yarn-I used cotton
- Glue-Aleene’s tacky glue
- Water
- Stem-scrap fabric, felt, or ribbon
- Leaves-scrap fabric, felt, or ribbon
- Balloon
- Scissors
- Paper Bowl
- Plastic fork
- Somewhere to hang when drying
- Paper plate-to put underneath when drying
*may contain affiliate links
step-by-step instructions to make a yarn pumpkin:
- Blow up your balloon to the size that you want your finished pumpkin to be.
- Cut a piece of yarn about 12″ long to hang your pumpkin later, and set aside. Wrap your yarn around the balloon to estimate how much you will need, cut the yarn from the ball. Remove it from the balloon and set aside.

3. Mix up your glue and water mixture, about half glue and half water, and mix well.

4. Laving a short tail to start with put the yarn into the glue/water mixture and saturate completely.

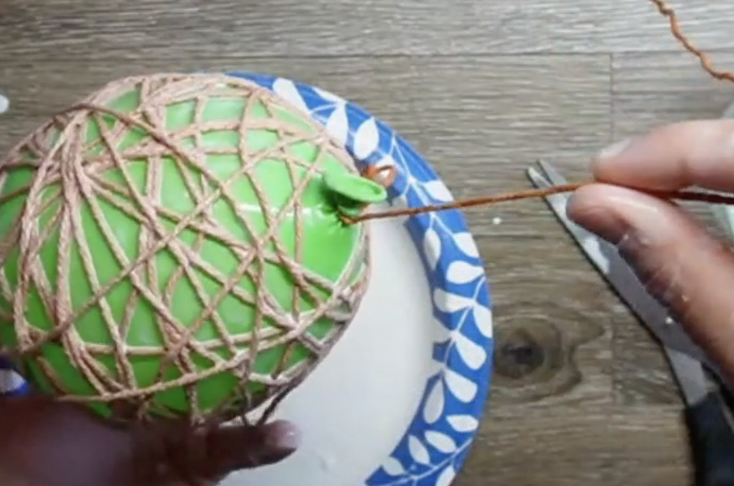
5. Starting with the tail you left start to wrap the glue covered yarn around the balloon, make sure to leave the balloon tie open. This is where it gets messy! Wrap evenly.

6. Once your balloon is wrapped completely tie the 12″ piece of dry yarn to the top of your balloon, where the tie is and hang up to dry. Make sure to place something underneath to catch drips.

7. Let your yarn pumpkin dry completely, around 8 hours or so.

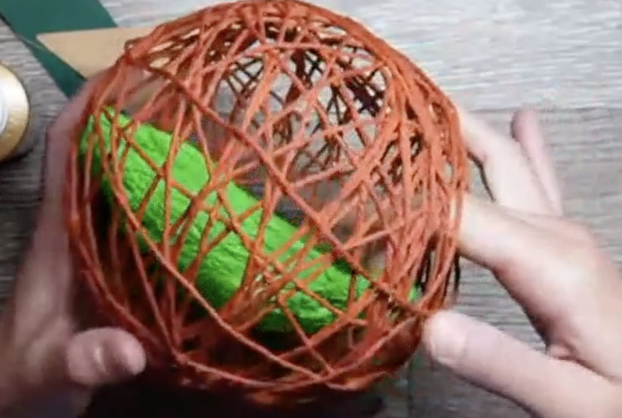
8. Cut the top of the balloon tie off, and remove the balloon carefully.


9. Tie the “leaf” fabric strip to the top of the yarn pumpkin, and trim the ends to create leaf shapes.

10. Roll the “stem” fabric into a tube and attach to the yarn/leaf fabric using tacky glue, you may need to hold it in place for a few minutes while it starts to dry.


11. Let the glue dry completely and you are ready to decorate with your fall yarn pumpkin!


COMMONLY ASKED QUESTIONS
Are there specific yarn colors that work best for creating a realistic pumpkin look?
While traditional orange is popular, you can also use shades of brown, cream, and even green to add depth and realism to your yarn pumpkins.
Can I use different types of yarn for this craft?
Yes, you can experiment with various textures and thicknesses of yarn to create different effects on your yarn pumpkins.
Can I display yarn pumpkins outdoors?
While yarn pumpkins are best suited for indoor decor, you can consider using weather-resistant materials if you plan to display them outdoors.
Great job! These whimsical pumpkins, made from simple materials and creative hands, stand not just as decorations but as tokens of the cozy warmth and charm that define the fall season. As you find the perfect spot for your creations – whether adorning your mantle, gracing your tablescape, or simply adding a touch of fall to any corner, these yarn pumpkins radiate the spirit of the season with their handmade allure.
For other yarn crafts for kids, check out The Makers Club which has yarn crafts, clay projects, sewing projects and more added each month. With access to all of the Elevation Handmade courses in addition to the new projects you child will love to explore inside the club!


