

Do you have kids who love playing catch? Well what’s better than creating your very own knit ball? There’s something magical about crafting handmade toys, especially when you involve your kids in the creative process. In this guide, we’ll explore a fun knitting project that allows you to create a delightful Knit Ball Toy. Not only will you and your little one enjoy knitting this toy together, but it also provides hours of entertainment once it’s finished. Let’s dive into this knitting adventure!
Supplies and Tools:
- Yarn – Choose a worsted weight or bulky yarn in a color that tickles your fancy.
- Knitting Needles – You’ll need knitting needles in size 8.
- Poly-fil or Stuffing – For filling your knit ball.
- Scissors – To trim yarn ends.
- Tapestry Needle – Essential for weaving in ends and assembly.
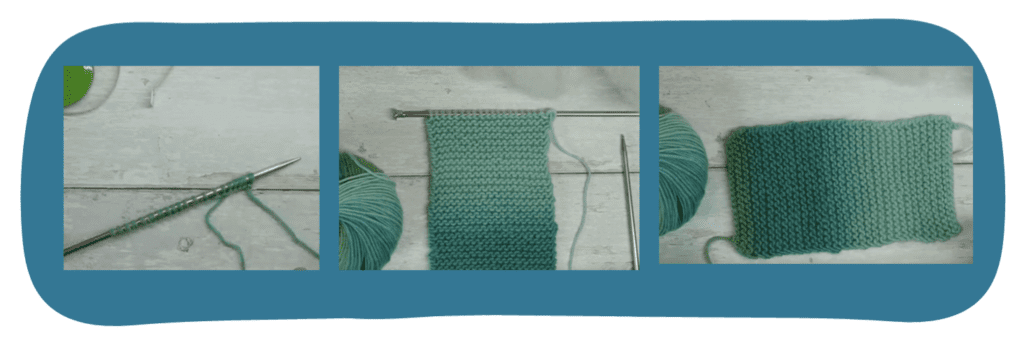
step-by-step instructions to make your own knit ball:
- Cast-on 20 stitches. using the long-tail cast-on method. This is flexible, it can be larger or smaller, and this is just a good starting point.
- Knit until your fabric measures 7.5″ long and then bind off. Another rule of thumb is that you can also knit a rectangle that when you fold it in half makes two equal squares.
3. Cut a length of yarn that goes from your fingertips to your shoulder, and double that up and cut. Thread your tapestry needle, I like to fold the yarn in half and wiggle the fold through the eye of the needle so I am not having to deal with the frayed edges of the yarn.

4. Thread the needle through the corner of one of the long edges, and tie a double knot to secure.

5. Start threading the yarn through the edge stitches on one of the long sides of the rectangle. Once you get to the end of the first edge, gently pull it tight to cinch it down, and tie the two ends together to secure.

6. Using the same piece of yarn that is attached to your ball start to stitch down the edges using a whipstitch to attach them together.

7. Now thread the yarn through the final edge to cinch together. Before you cinch it down all the way start adding your stuffing as full as you want it. You can even try using scrap yarns, or fabric to stuff if you have some on hand!

8. Cinch the top down completely tie the end off with a couple of knots, and tuck in the loose ends of the yarn. Now you can trim the ends.


Your Knit Ball Toy is now ready for play! Whether it’s for tossing, squeezing, or just admiring, this handmade creation is sure to bring joy and creativity into your child’s day. Your child will be so proud of what they have created and as a bonus they get to stay active and play catch with friends and family with a homemade ball!
Why You’ll Love This Knitted Ball Tutorial:
Crafting a Knit Ball Toy is not just about making a toy; it’s about creating lasting memories and sharing quality time with your child. This project allows you to introduce them to the world of knitting while providing them with a unique and cherished toy. So, gather your supplies, ignite your creativity, and enjoy the rewarding experience of crafting with your child. Happy knitting and playing!
Knitting is a great skill for kids to learn, it helps them to relax and keep their hands busy while making something functional! If your child is interested in learning how to knit from start to finish then our Beginner Knitting Course would be great for them! Your child will learn all the skills needed to create knitting projects throughout the course.